Focus Stacking
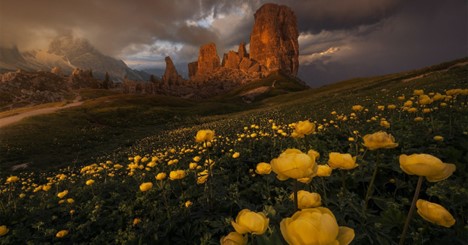
Have you ever seen a picture so perfect where every part of the picture is clear or completely in focus? If you’re like most people, you might be wondering “How did they pull this off to capture it?” Chances are they created a very sharp image using focus stacking techniques. Focus stacking shots are used to shoot a variety and diversity of subjects from landscapes to products, and macro photography photos. What is focus stacking and how do you do it to create amazingly sharp photos? To find the answers to these two questions and more in this article.
WHAT IS FOCUS STACKING IN PHOTOGRAPHY?
Focus Stacking Explained Is The Following.
The concept of focusing can seem confusing, but once you understand what it is and how to do it, it will be much easier or simple to do.
Now before we get into the “how”, let’s examine the “what” by defining the focus stacking.
Focus stacking is a technique designed to achieve a deep depth of field by blending (or stacking) several images together to create a single image. Each stacked shot is focused on various planes, so the combined depth of field is deeper than the depth of field produced by any of the individual images. Focus stacking, also called photo stacking or focus layering allows photographers to create a single image with extreme clarity and sharpness.
The process involves photographing the same composition multiple times with different unique focal points. These images are then composited or entered into Photoshop or other editing software to create a single image in which all of the elements in the photo are focused. Focus stacking (photo stacking) is often used in landscape photography, stock or product photography, and macro photography when it’s you want all objects in focus.
Equipment needed:
• Travel Tripod
• Camera that can take pictures in manual mode
• Photoshop or Focus stacking software
When to use focus stacking
Focusing stacking can seem like a tedious process for creating one photo or image. However, it can create incredibly sharp images that are otherwise impossible to achieve.
The simple answer is when you are taking a photo and want many objects at different varying distances to be completely in focus.
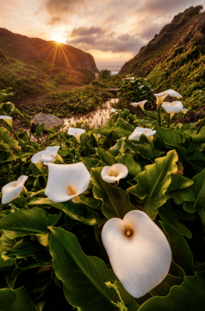
For example, the only way to capture an image where the flowers are in the foreground and a sunset in the background are all extremely sharp in focus is when you use focus layering techniques.
You may be thinking, “If you want a deeper depth of field in focus, why not just close down the aperture setting?” While a smaller aperture like using f/22 will create a deeper depth of field, it also reduces the amount of light entering the camera and reduces the clarity of your image.
To see how to do focus stacking, search the Internet or YouTube to find how to tutorials to learn more about the benefits of photo stacking and the situations in which they are used.
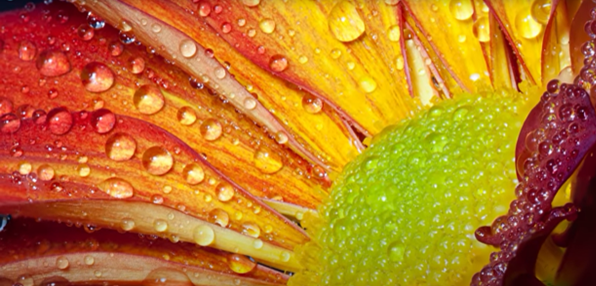
Now that we’ve talked a bit about when and why to focus stacking, let’s see how to do it. All you need is a good tripod, DSLR, or mirrorless camera that can shoot in manual modes, and photo editing software that can be used for photo stacking i.e., Photoshop. There are two parts to creating a photo stacked image: 1) shooting and 2) editing.
Let’s first see how to take or shoot the images.
How to stack photos
Shoot the image
When focus stacking, using a tripod or some type of fixed stabilizer for your camera is very important. Since focus grouping involves combining multiple photos, all photos must have the same or exact composition. You’ll also want to set your camera to manual mode so you can vary your focal points for all your different shots.
1. Create & compose your shot
An important step in taking any photo is to decide how to compose your shot. Start by framing the shot you want and composing the different things in the frame desired. It’s important to make sure your composition is right because focus grouping involves combining or merging multiple images. If your composition changes, you will have to start the whole process all over.
Also keep in mind that photo stacking editing may require a bit of cropping when combining your photos. So, shoot just a little wider than normal so you don’t crop out any important details. Once you’ve decided on your composition, set up your tripod and lock it down.
2. Adjusting your settings
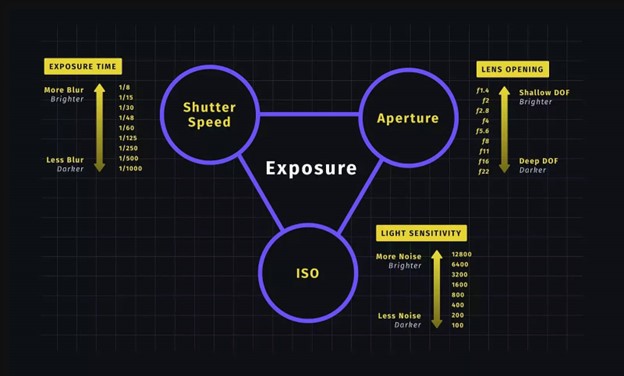
Now, properly expose your photo shot. Consistency of exposure from shot to shot is important for focus stacking your desired cohesive images. Shoot in manual mode so you have full control over the entire exposure triangle.
Remember to try keeping your ISO low to avoid creating any image noise. Using a wider aperture setting will help you capture more detail, but it will also require you to take more shots. Make sure your shutter speed is always fast enough to keep your images sharp.
3. Focus on the first area of the image
Now that your camera is ready to shoot, set your camera to single focus point mode so that you can adjust the specific focal point of your shot. If you’re experienced enough, shooting manual mode with a live view of the image will give you even more control over the focal points.
Begin by focusing on the area of the photo that is closest to your lens. Take the photo and check to make sure that your exposure and focal point are correct before moving on to next step. Here is a field example of focus stacking that will help you get a better idea of how to execute this step.
4. Take multiple shots with varying focus points
Next, change the focal point of the camera to the next section of the image you are working on. Shoot the next image and repeat this process while slowly moving your focal points backward until you’ve taken photos of every section in focus.
Once you’ve captured all the images you need to do, it’s time to bring them into Photoshop or other editing software to composite them together.
Editing the image
The real magic of photo stacking happens in the editing process. To focus stack images effectively, you’ll want to use Adobe Lightroom and Photoshop or other preferred software. Let’s look at one of the fastest ways to focus stack using Adobe Photoshop.
1. Select your photos
First, upload the files from your shoot into Lightroom. In your Library, click the grid view and select the photos you wish to focus on and edit.
2. Applying edits
Apply any editing you wish to see in the final photo to the first photo in the photo stack. Once you are satisfied with adjusting your contrast, highlights, colors, etc., you will need to synchronize the edits to the rest of the photos in the stack to make sure they are all visually consistent.
To do this, hold down shift key and select all the photos in the stack. Right click on the image you have edited and then click the following sequence: Develop Settings > Sync Settings.
These actions will show you all the edits you have made that you want to apply to all the photos. When completed finally, click on “Synchronize.”
2. Open in Photoshop
Now open these images in photoshop by clicking the following sequence: Choose Photo > Edit in > Open as Layers in Photoshop. This action will open Photoshop with your selected photos as layers in the stacking project.
3. Alighting the photo layers
To alight the photo layers in photoshop, make sure you have your photos selected. Then click the following sequence: Choose Edit > Auto-Align Layers. Click “Auto selected” before finally clicking OK. Photoshop will then alight the photo layers.
4. Blend the layers
Finally, you’ll want to blend the layers to create a single, focus-stacked image. Do this by selecting all the photos. Then click the following sequence: Choose Edit > Auto-Blend Layers.
Make sure you select “Stack Images” in the dialog box before clicking OK. This should result in a focus stacked photograph which will appear as a layer mask.
That’s about it! Focus stacking is an incredibly useful tool that can open the door to capturing truly unique photos. While it may not be a technique you use for every photo you shoot, but with practice and experience, focus stacking will make you a more versatile photographer and professional. Focus stacking may seem a bit tedious but can be incredibly fast and painless process. If you enjoyed this post on photo stacking, give us a like on our social media links for Tread Productions. For information about our services give us a call at (703) 582-0833.
